Blog Archive

Showing posts with label GIGABYTE. Show all posts

Tuesday, 10 January 2012

‘Hardware Secrets’ see outstanding value in the GIGABYTE X79-UD3

X79-UD3_UI_1_s

Gabriel Torres writing for Hardware Secrets has just published an in-depth first look at our entry-level X79 offering, the GIGABYTE X79-UD3. Obviously the X79-UD3 model is aimed more cost conscious X79 platform builders, but as well as offering great value, we’ve also tried hard to offer a board with a complete range of features. Here’s a sample of what Gabriel had to say:

“Today there are only three socket 2011 motherboards cheaper than the Gigabyte X79-UD3, the ASRock X79 Extreme-4M (USD 220), the MSI X79MA-GD45 (USD 230), and the ASRock Extreme4 (USD 235), and all of them have fewer features and don’t come with four PCI Express x16 slots. True competitors from MSI and ASUS cost more, making the Gigabyte X79-UD3 your best option if you want to save money while building a PC based on a Core i7 “Sandy Bridge-E” processor with four video cards and yet have a high-quality motherboard with lots of extra options.”

You can catch the full article here on Hardware Secrets.

More details about the GIGABYTE X79-UD3 can be found here.

Guru3D give the GIGABYTE X79-UD7 some Dutch love…

imageview

Hilbert Hagedoorn just gave our X79-UD7 motherboard stamp of approval in his latest review for Guru3D.com. Designed to offer overclockers all the tools and features needed to break serous records on Intel’s new Sandy Bridge-E processors, the GIGABYTE X79-UD7 wears our OC badge with pride. After having put the board through its paces, here’s a sample of what Hilbert had to say:

“The X79 UF7 is an impressive motherboard. It's feature rich, a great overclocker and has downright gorgeous looks. If you are a novice overclocker and go for easy, flick the OC button at the rear IO backplate and it will get you an instant performance boost. Overclocking itself with the new 3D BIOS is fun as well, it really is an easy to work in environment. Gigabyte implemented two uEFI BIOSes by the way, you can can switch in-between them (say a normal and high performance profile), good stuff.

For overclocking itself we reached 4800 MHz in a matter if minutes and 5 GHz after a while. That last step did need some fine-tuning though. Mind you though that we work with vanilla picked engineering sample CPUs, we can never guarantee you'll achieve the same results at home. It works vice versa as well, we've seen end-users with much higher overclocks then we have ever achieved, good on ya ;)”

The UD7’s dashing orange paint job gleaned some additional love, which is not so surprising - coming from the heart of a Dutchman.

 “Now I live in the Netherlands, we dig Orange as its our national color, as such I adore the looks of the motherboard, but that won't be the same for everybody though. The color is very out there. If you like it, then you're in luck as it's one of the best X79 motherboards out there on the market that matches your style, looks, features and options.”

Check out the full review here on Guru3D.

Details about the GIGABYTE X79-UD7 can be found here.

Sandy Bridge plus Z68 on a budget? eTeknix choose the GIGABYTE Z68AP-D3

IMG_3227

Andy Ruffell, writing for UK techies eTeknix, yesterday published his in-depth review of our Z68AP-D3 board, a motherboard that’s aimed squarely at those of us who want to taste the pleasures of Intel’s latest Sandy Bridge CPUs coupled with the latest Z68 chipset, without causing injury to our bank balance. At a smidgen over 80 British Pounds, Andy saw plenty of evidence to warrant a ‘Bang for Buck’ award, however he was actually impressed enough with the board’s overall performance to wheel out the more prestigious ‘Editor’s Choice’ award:

“Having a quick talk about the rating, which we don’t normally delve into, I wanted to clarify why this board earns our prestigious Editor’s Choice Award. It was destined to gain the Bang For Buck Award but the performance results showed us that it can rival some of the bigger, more expensive boards on the market, and the icing on the cake was how well it overclocked. The board really did meet, exceed and literally fly past our expectations, and we have to congratulation Gigabyte on making such a fantastic board.”

Editors-Choice

High praise from Andy. Cheers. Catch the full review on eTeknix here.

Find out more about the Z68AP-D3 motherboard here.

Video: GIGABYTE G1.Assassin 2 unboxed on Newegg TV…

You know, I just cannot resist a good unboxing video…all that plastic wrapping and crisp packaging…you can almost smell the fresh PCB scent. So you can imagine how I felt when I saw that Paul from Newegg TV had just uploaded a new video showcasing our top-of-the-line G1-Killer board, the X79-based G1.Assassin 2. Take a look.

<\/param><\/embed><\/object><\/div>";" alt="">


Check out more details on the G1.Assassin 2 on our GIGABYTE website here.

Newegg pricing here.

HardwareZone just put up their GIGABYTE X79-UD7 review – “Raising The Bar Higher”

HardwareZone just did a review of the GIGABYTE X79-UD7. They pitted it against the MSI X79A-GD65 (8D) and used an Asus Rampage 3 Extreme as a comparison only to find the UD7 steam roll its competition in spectacular fashion.5304_big

Performance Unleashed

The series of tests that we employed on the Gigabyte X79-UD7 was the same as the one that we had used on the MSI X79A-GD65 (8D). Below is a rundown of the components and benchmarks that we had. We also compared the X79-UD7's scores to those of the ASUS  Rampage III Black Edition to see the former's advantage over an X58-based platform like the latter.

By and large, we can see that the X79-UD7 fared better than the X79A-GD65 (8D), and, logically, much more than the X58-based Rampage II Black Edition motherboard. On Futuremark's PCMark Vantage, it is obvious that the X79-UD7, coupled with a powerful graphics card like the Gainward GTX 580 Phantom 3 1536MB, got a very high score on the Gaming category of the benchmark. Such an impressive gaming performance remained consistent with the scores that the X79-UD7 garnered on the game benchmarks of Warhammer 40000: Dawn of War II – Retribution and Metro 2033, wherein the Gigabyte overshadowed the MSI and the ASUS boards.


Clipboard01bClipboard01ffClipboard01

Anandtech select GIGABYTE motherboards in Seasonal Buys Guide 2011

Anandtech has just published their buyer’s guide for the forthcoming holiday season. Zach Throckmorton sketches out a bunch of systems tailored for a mainstream high-end user. We are of course deeply flattered to see that Zach has opted for GIGABYTE motherboards for both the ‘Gamer’s Delight’ and the ‘Productivity Powerhouse’ builds.

Gamer’s Delight: The GIGABYTE Z68XP-UD3

Z68XP-UD3

“Gigabyte's GA-Z68XP-UD3 is an ATX form factor motherboard with all of the bells and whistles. It is a very capable overclocker and in my experience very reliable as well. While it's definitely not in the highest echelon of LGA 1155 motherboards, it is a solid higher-end mainstream motherboard. Perhaps of most interest to gamers, it supports both SLI and CrossFire….”

Anandtech-Xmas-1

Productivity Powerhouse: The GIGABYTE X79-UD3

X79-UD3

“Gigabyte's GA-X79-UD3 is an ATX form factor motherboard that represents a good value amongst X79 chipset boards. If your applications benefit from GPU acceleration, it has two PCIe x16 and two PCIe x8 lanes....”

Anandtech-Xmas-2

Check out the full guide at Anandtech here.

GIGABYTE Z68XP-UD3 motherboard webpage.

GIGABYTE X79-UD3 motherboard webpage.

New BIOS (Version F7) for GIGABYTE X79 series motherboards

If you are using a GIGABYTE X79 series motherboard for overclocking, we suggest that you to upgrade to the new F7 BIOS. If you’re not overclocking then there is no need to upgrade the BIOS, but it won’t hurt to do so either. 

We welcome any enquiries or service queries through our official customer service center: http://www.gigabyte.com/support-downloads/customer-service.aspx.

Updating BIOS using the GIGABYTE Q Flash Utility

Seeing that GIGABYTE has announced a new BIOS for X79 series users I thought it might be useful to just revisit the job of actually updating your motherboard’s BIOS. While for more experienced users, power users and overclockers, this will be a simple and familiar task, this is a simple guide that less experienced users can refer to when updating their BIOS that is based on the user-friendly GIGABYTE Q Flash utility.

While there are several ways to update your motherboard’s BIOS, many advanced users prefer to use GIGABYTE Q Flash, a utility embedded within your board’s CMOS BIOS ROM. Q Flash updating is preferred simply because it doesn’t rely on a stable OS environment to ensure safe BIOS updating, i.e. it removes your OS as a possible failure point.

The first thing you should do is visit the GIGABYTE website to find the latest BIOS version for your motherboard. Each BIOS version is preceded with the letter F followed by a number. So for example, in the case of our new X79 series BIOS updates, the latest version for these boards is currently version F7. The file that you download from us is a self-executable 7-Zip file (basically a compressed folder containing several files). To open the file simple double-click on it, inside you’ll find three files (GIGABYTE also bundles some small, useful files to help you update your BIOS in a DOS environment, but we’ll leave that for another day). The one file we need is named the same as your motherboard, followed by a dot and the BIOS version. So in the case of the X79-UD3 board, the file we’re looking is simply named X79UD3.F7

X79-UD3-F7-BIOS-Download

Next we have to copy this BIOS file to a USB thumb drive. In the old days, we would use a floppy drive, but today, you can use any type of USB thumb drive of any capacity or brand. The only stipulation is that it must be formatted in FAT32 – but don’t worry, FAT32 is by far the most common formatting type for USB thumb drives, so it shouldn’t be an issue.

clip_image002

Now, with our USB thumb drive connected, we can reboot the PC. As the PC restarts and enters POST, press the ‘End’ key on you keyboard. This will automatically take you to the GIGABYTE Q Flash utility. Note: you can also also access Q Flash from inside BIOS by pressing the ‘F8’ key. Once inside the Q Flash utility, you find a simple GUI with two choices. Firstly ‘Save BIOS from Drive’ (this can be used to make a copy of your BIOS), or ‘Update BIOS from Drive’ which is the one we want to select.

clip_image002[6]

Once we select ‘Update BIOS from Drive’ we will then see a list of connected FAT32 drives, so unless you have several USB thumb drives connected, (or you’re one or more of your hard drives are formatted in the now outdates FAT32 format system), the drive that appears here will be the USB thumb drive with your new BIOS on it. Select that drive.

clip_image002[12]

You’ll then see all a list of applicable BIOS files on the drive. Note: if you have several BIOS versions on the drive, these will all be shown, so select the new BIOS file, which in the example above would be X79UD3.F7. Once you have selected the new BIOS file, press Enter.

clip_image002[14]

Q Flash will then verify that the selected file is compatible, and then write the new BIOS file to the CMOS chip on your board. After verifying the BIOS once more, you’ll see the ‘Copy BIOS completed – Pass!’ message which means you’re good to go.

Once you reboot, you’ll find your PC has returned to ‘Optimized Default’ BIOS settings, so by all means, setup your BIOS as you prefer in terms of Boot Order, Overclocking and device configurations.


HiCookie smashes Core i7 3930X world records on GIGABYTE X79-UD3

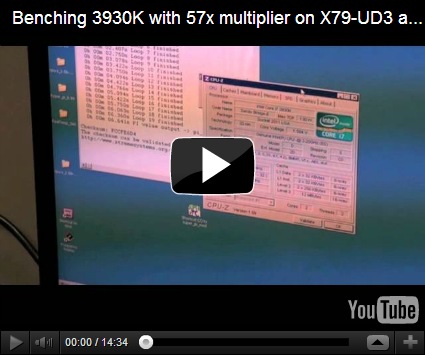
Yesterday our resident overclocking guru HiCookie took his Intel Core i7 3930X CPU, a X79-UD3 armed with our new F7 BIOS release, copious amounts of LN2 and set down to some serious overclocking action. The resulting world records were soon posted on HWBot. Another day, another line drawn in the sands of high-performance computing. Pushing a CPU core frequency of 5643.3 MHz, related records for SuperPi and PiFast were unceremoniously smashed.

Catch the video below for a front row seat.

<\/param><\/embed><\/object><\/div>";" alt="">

New 3930X Records;

Super Pi 1M - 6.64 seconds
Super Pi 32M – 6mins 8.516 seconds
PiFast – 13.02 seconds
CPUz – 5643.3MHz

You can find more details about the new F7 BIOS here, and the X79-UD3 here.

Tom’s Hardware coverage.

Hicookie ups his world records with GIGABYTE X79-UD3 during media live show in Beijing

Hicookie attended a media conference in Beijing overnight and broke out the LN2 and redid some of his records. He used GIGABYTE X79-UD3 & 3930K with the latest F7 bios.

707334

SuperPi 32M: 5min57.328sec
http://www.hwbot.org/​submission/​2237975_hicookie_superpi_32m_co​re_i7_3930k_5min_57sec_328ms

Pifast:12.95sec
http://www.hwbot.org/​submission/​2237977_hicookie_pifast_core_i7​_3930k_12.95_sec

SuperPi 1M: 6.625sec
http://www.hwbot.org/submission/2237978_hicookie_superpi_core_i7_3930k_6sec_625ms

Futurelooks take on the GIGABYTE G1. Assassin 2

GIGABYTE-G1-Killer-Assassin-2-Sandy-Bridge-E-Motherboard-9

Eric Garay from Futurelooks.com has published his review of our flagship X79 gaming board, the GIGABYTE G1.Assassin 2, and we’re delighted to see Eric give the board his Recommended award.

You can also watch a video of Eric as he takes a tour of the retail package and of course all of the boards various features.

<\/param><\/embed><\/object><\/div>";" alt="">

You can check out the full and detailed review here on Futurelooks.com

If you’re interested in perusing technical specifications etc, you can find the G1.Assassin 2 product page here.

CES 2012: GIGABYTE Shows future 7 series motherboard lineup by Legit Reviews

Dan from Legitreviews.com reported today on some next generation GIGABYTE boards. Among the lineup shown one caught his attention, known internally as the new pocket rocket, GIGABYTE G1 Sniper M3.

gigabyte-g1-sniper-m3-3

g1-sniper-m3

Bring it onzzzz!

Monday, 9 January 2012

Updating BIOS using the GIGABYTE Q Flash Utility

Seeing that GIGABYTE has announced a new BIOS for X79 series users I thought it might be useful to just revisit the job of actually updating your motherboard’s BIOS. While for more experienced users, power users and overclockers, this will be a simple and familiar task, this is a simple guide that less experienced users can refer to when updating their BIOS that is based on the user-friendly GIGABYTE Q Flash utility.

While there are several ways to update your motherboard’s BIOS, many advanced users prefer to use GIGABYTE Q Flash, a utility embedded within your board’s CMOS BIOS ROM. Q Flash updating is preferred simply because it doesn’t rely on a stable OS environment to ensure safe BIOS updating, i.e. it removes your OS as a possible failure point.

The first thing you should do is visit the GIGABYTE website to find the latest BIOS version for your motherboard. Each BIOS version is preceded with the letter F followed by a number. So for example, in the case of our new X79 series BIOS updates, the latest version for these boards is currently version F7. The file that you download from us is a self-executable 7-Zip file (basically a compressed folder containing several files). To open the file simple double-click on it, inside you’ll find three files (GIGABYTE also bundles some small, useful files to help you update your BIOS in a DOS environment, but we’ll leave that for another day). The one file we need is named the same as your motherboard, followed by a dot and the BIOS version. So in the case of the X79-UD3 board, the file we’re looking is simply named X79UD3.F7

X79-UD3-F7-BIOS-Download

Next we have to copy this BIOS file to a USB thumb drive. In the old days, we would use a floppy drive, but today, you can use any type of USB thumb drive of any capacity or brand. The only stipulation is that it must be formatted in FAT32 – but don’t worry, FAT32 is by far the most common formatting type for USB thumb drives, so it shouldn’t be an issue.

clip_image002

Now, with our USB thumb drive connected, we can reboot the PC. As the PC restarts and enters POST, press the ‘End’ key on you keyboard. This will automatically take you to the GIGABYTE Q Flash utility. Note: you can also also access Q Flash from inside BIOS by pressing the ‘F8’ key. Once inside the Q Flash utility, you find a simple GUI with two choices. Firstly ‘Save BIOS from Drive’ (this can be used to make a copy of your BIOS), or ‘Update BIOS from Drive’ which is the one we want to select.

clip_image002[6]

Once we select ‘Update BIOS from Drive’ we will then see a list of connected FAT32 drives, so unless you have several USB thumb drives connected, (or you’re one or more of your hard drives are formatted in the now outdates FAT32 format system), the drive that appears here will be the USB thumb drive with your new BIOS on it. Select that drive.

clip_image002[12]

You’ll then see all a list of applicable BIOS files on the drive. Note: if you have several BIOS versions on the drive, these will all be shown, so select the new BIOS file, which in the example above would be X79UD3.F7. Once you have selected the new BIOS file, press Enter.

clip_image002[14]

Q Flash will then verify that the selected file is compatible, and then write the new BIOS file to the CMOS chip on your board. After verifying the BIOS once more, you’ll see the ‘Copy BIOS completed – Pass!’ message which means you’re good to go.

Once you reboot, you’ll find your PC has returned to ‘Optimized Default’ BIOS settings, so by all means, setup your BIOS as you prefer in terms of Boot Order, Overclocking and device configurations.

TOP PRODUCTS

Total Pageviews

About Me

My photo
Thanjavur, Tamilnadu, India

PRODUCTS

Design by ROCKY| computer hardware by ROCKY